

Blog
Five Common Mistakes When Using an Epoxy Resin Calculator and How to Avoid Costly Errors

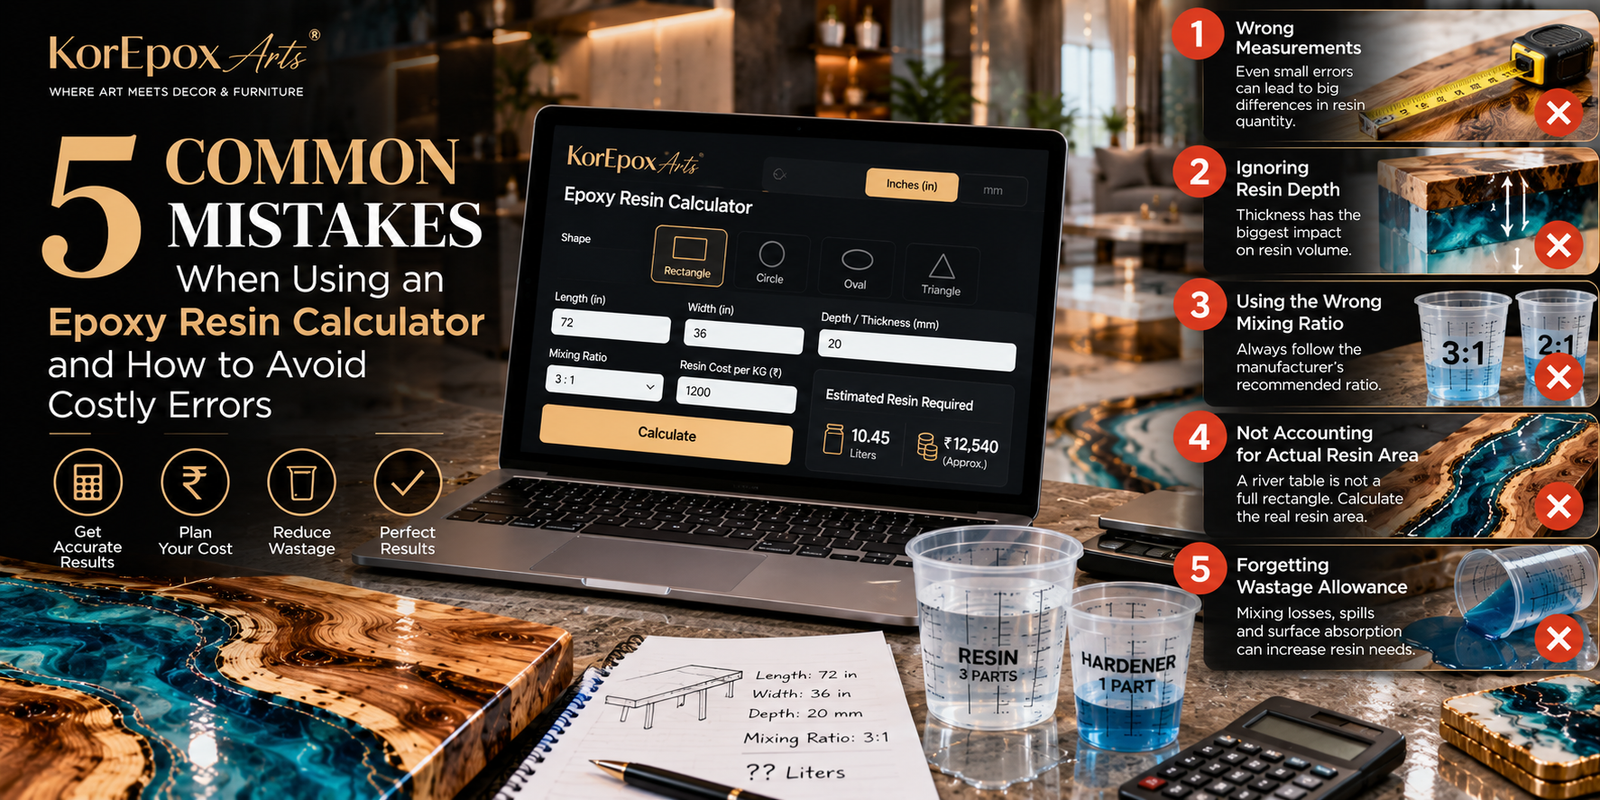
When planning an epoxy resin project, one of the first questions is usually:
“How much epoxy resin will I need?”
Whether you’re planning a custom river table, resin coaster, serving tray, countertop or epoxy flooring project, an epoxy resin calculator can make material estimation considerably easier.
But there’s an important catch.
A calculator is only as accurate as the information you put into it.
Entering the wrong dimensions, forgetting resin depth or using the wrong mixing ratio can turn a seemingly simple calculation into an expensive mistake. For a large bespoke resin table or flooring project, even a small calculation error can mean several thousand rupees worth of unnecessary material—or, worse, running out of resin during the project.
At KorEpox Arts, we believe clients should understand what goes into their resin projects rather than simply receiving a final price.
In this guide, we’ll look at five of the most common epoxy resin calculator mistakes, explain why they happen and show you how to avoid them.
Why Accurate Epoxy Resin Calculation Matters
Epoxy resin is a valuable material, particularly when you’re working on large furniture or decorative projects.
Accurate calculation helps you:
Estimate material requirements
Control project costs
Reduce unnecessary wastage
Prepare accurate quotations
Plan purchases
Avoid running out of resin
Compare different design options
Understand how design changes affect cost
For a small coaster, an error may only cost a few rupees.
For a large dining table or flooring project, the same calculation error can become a significant expense.
That’s why learning how to use a resin calculator correctly is so important.
Mistake 1: Entering Incorrect Measurements
This is probably the most common mistake.
It sounds obvious, but inaccurate measurements are surprisingly easy to make.
You might measure:
72 inches
when the actual dimension is:
74 inches
That two-inch difference may not sound significant.
But when the calculation involves width and thickness as well, the difference can become substantial.
How to Avoid It
Before entering measurements into your epoxy resin calculator:
Measure the actual project.
Measure each dimension at least twice.
Use the same measurement unit throughout.
Check whether the calculator expects inches, millimetres or another unit.
Record the measurements before entering them.
For furniture projects, don’t rely solely on an old drawing or quotation.
Measure the actual mould, cavity or resin-filled area whenever possible.
Mistake 2: Ignoring Resin Depth
If there is one number that can dramatically change your resin requirement, it is depth.
Consider a simple example.
You have a surface measuring:
72 × 36 inches
Now compare:
10 mm resin depth
with:
20 mm resin depth
Doubling the depth approximately doubles the resin volume when the resin-filled area remains the same.
This is why entering the correct thickness is critical.
How to Avoid It
Measure the actual depth of the area that will be filled with resin.
Don’t assume:
“The tabletop is one inch thick, so I need one inch of resin.”
The wooden portion of the table may occupy most of that thickness.
The resin may only fill a river channel, void or decorative section.
Remember:
Overall furniture thickness ≠ resin thickness.
This distinction can make a major difference in your calculation.
Mistake 3: Using the Wrong Resin-to-Hardener Mixing Ratio
Different epoxy systems use different mixing ratios.
Common ratios include:
1:1
2:1
3:1
However, these ratios are product-specific.
You cannot simply choose 3:1 because another epoxy you previously used was 3:1.
For example, if a product specifies:
3:1
that generally means:
3 parts resin + 1 part hardener
If you use an incorrect ratio, the problem isn’t simply that your calculation will be wrong.
The epoxy itself may fail to cure correctly.
Incorrect proportions can affect:
Cure time
Hardness
Surface quality
Strength
Chemical resistance
Final appearance
How to Avoid It
Before using an epoxy resin calculator:
Check the manufacturer’s technical data sheet or product instructions.
Then enter the correct ratio into the calculator.
Never change the manufacturer’s recommended mixing ratio to compensate for a calculation.
The calculator estimates quantity.
It does not change the chemistry of the resin system.
Mistake 4: Calculating the Entire Object Instead of the Actual Resin Area
This mistake is especially common with river tables.
Imagine a dining table measuring:
72 × 36 inches
If you simply enter:
72 × 36 × resin depth
you are effectively calculating the volume of a solid rectangular block.
But your table isn’t made entirely from resin.
It contains:
Wood slabs
Live edges
Voids
River sections
Decorative areas
The resin may occupy only a fraction of the total tabletop.
Therefore, using the complete tabletop dimensions could significantly overestimate your resin requirement.
How to Calculate a River Table More Accurately
Instead of calculating the entire table, estimate the actual resin-filled region.
For a simple river design, you could approximate:
River Area × Resin Depth
For more complex designs, divide the river into sections.
For example:
Section A + Section B + Section C = Total Resin Area
Then calculate the approximate volume of each section.
This is particularly useful when the river:
Changes width
Curves
Splits
Contains islands of wood
Includes multiple channels
Has irregular live edges
The more irregular the design, the less reliable a simple rectangular calculation becomes.
For highly complex projects, physical measurement, mould-volume estimation or professional assessment may provide a more reliable result.
Mistake 5: Forgetting Wastage and Practical Material Loss
Even if your mathematical calculation is perfect, real-world resin projects aren’t perfectly efficient.
Some resin may remain in:
Mixing containers
Measuring cups
Buckets
Transfer containers
Application tools
You may also experience:
Small spills
Surface absorption
Porous wood
Uneven substrates
Minor design changes
That’s why ordering exactly the mathematical minimum isn’t always practical.
How Much Extra Resin Should You Allow?
There isn’t one universal percentage that works for every project.
A simple, flat mould may have relatively low practical losses.
A complicated river table with porous timber and multiple pours may require a larger allowance.
Flooring projects can also behave differently depending on substrate porosity, coating system and application method.
The best approach is to consider:
Calculated requirement + realistic project allowance
rather than automatically adding a large percentage to every calculation.
Bonus Mistake: Confusing Litres With Kilograms
Although our focus is on five major mistakes, there is another issue worth mentioning.
Litres and kilograms are not the same thing.
Litres measure:
Volume
Kilograms measure:
Mass
The relationship depends on the density of the resin system.
Therefore:
1 litre of epoxy does not necessarily weigh 1 kg.
If your supplier sells epoxy by weight but your calculator gives litres, use the manufacturer’s density information to make the conversion.
This is particularly important when preparing material budgets.
Example: Why Small Errors Can Become Expensive
Imagine you’re planning a large custom resin table.
Your calculation says you need:
20 litres
But an incorrect thickness entry results in:
25 litres
That’s an additional:
5 litres
If your mixed epoxy material costs ₹1,200 per litre, the difference would be:
5 × ₹1,200 = ₹6,000
The exact cost will naturally depend on the resin system and supplier.
The example illustrates the principle:
A small measurement error can become a meaningful financial error on a large project.
How to Use an Epoxy Resin Calculator Correctly
Before pressing the Calculate button, follow this checklist.
Step 1 — Identify the Shape
Is your project:
Rectangle?
Square?
Circle?
Oval?
Ellipse?
Triangle?
Irregular/custom shape?
Choose the closest applicable calculation method.
Step 2 — Measure the Actual Resin-Filled Area
Don’t automatically use the overall furniture dimensions.
Ask:
“Where will the resin actually go?”
For a river table, this might be the river channel.
For a coaster, it might be the complete mould.
For flooring, it may be the entire prepared floor area.
Step 3 — Confirm the Depth
Measure the actual resin depth.
For example:
5 mm
10 mm
20 mm
30 mm
The difference can have a major impact on material requirements.
Step 4 — Confirm Your Units
If your calculator uses inches:
Enter the dimensions consistently in inches.
If thickness is entered separately in millimetres:
Make sure you understand how the calculator handles that conversion.
Never mix units manually without converting them.
Step 5 — Confirm the Mixing Ratio
Check the epoxy manufacturer’s instructions.
Then select:
1:1, 2:1, 3:1, etc.
according to the actual product.
Step 6 — Enter the Correct Resin Price
If you’re calculating project cost, use the actual purchase price of the resin system.
Be clear whether the quoted price is:
Per kg
Per litre
Resin only
Resin + hardener
Otherwise your cost estimate can become misleading.
Step 7 — Review the Result
Before purchasing materials, ask:
Does the result make sense for the physical project?
If your calculator suddenly says a small coaster requires 10 litres of resin, stop and check your units.
If a large river table says it needs only 500 ml, something is probably wrong.
A calculator should be used alongside common sense.
Epoxy Resin Calculator for River Tables
River tables are among the projects where accurate calculation matters most.
The calculation should consider:
Table length
Table width
Resin-filled area
Average river width
Resin depth
Voids
Number of channels
Wood absorption
Number of pours
For a large river table, it’s often better to break the design into manageable sections instead of trying to force an irregular shape into a simple rectangle.
Pro tip:
If you’re creating a custom river table, make a rough top-view sketch and divide the resin area into smaller geometric sections.
This can make your estimate significantly more practical.
Epoxy Resin Calculator for Coasters
Coasters are much simpler.
For a circular coaster, the calculation is based on:
π × radius² × depth
For multiple coasters:
Single coaster volume × number of coasters
But don’t forget the practical losses associated with mixing and pouring.
For a batch of 20 or 50 coasters, even a small per-piece difference can add up.
Epoxy Resin Calculator for Flooring
Flooring requires a slightly different approach.
Suppose a room measures:
20 ft × 15 ft
The floor area is:
300 sq. ft.
But epoxy flooring isn’t simply a matter of calculating the total volume of a block.
You may need to consider:
Primer
Base coat
Decorative layer
Self-levelling epoxy
Topcoat
Coverage rate
Number of coats
Substrate porosity
Surface preparation
The manufacturer’s specified coverage rate and system thickness should therefore be used for professional flooring estimates.
A generic calculator can provide a starting estimate, but it shouldn’t replace the technical specification for a commercial flooring system.
Why Accurate Calculation Builds Client Trust
For a bespoke furniture company, transparency matters.
When a client asks:
“Why does my table cost ₹X?”
being able to explain the material requirements makes the quotation easier to understand.
Instead of simply giving one number, you can explain:
Approximate resin quantity
Wood requirements
Resin system
Table dimensions
Finishing
Hardware
Labour
Delivery
This creates a more professional buying experience.
At KorEpox Arts, technical planning and artistic design go hand in hand.
How KorEpox Arts Uses Resin Calculation in Custom Projects
A custom resin table isn’t just about pouring resin into wood.
Before production begins, multiple factors need to be considered.
Design
What does the client want the final piece to look like?
Dimensions
What are the final length, width and thickness?
Resin Area
How much of the design actually contains epoxy?
Pour Depth
How deep will the resin be?
Resin System
Which epoxy is appropriate for the application?
Material Cost
How much will the resin, wood and other materials cost?
Finishing
Will the final surface be gloss, matte or another finish?
This approach helps turn an initial design concept into a realistic project plan.
Don’t Let a Calculator Replace Professional Judgement
An epoxy resin calculator is an excellent planning tool.
But it isn’t a substitute for experience.
A calculator cannot automatically know:
Whether wood is sufficiently dry
Whether the mould is properly sealed
Whether the substrate has moisture problems
Whether the selected resin is suitable for the pour depth
Whether a particular flooring system is appropriate
How much a highly irregular live edge will absorb
Whether the project requires multiple pours
For large or technically demanding projects, these factors should be evaluated by someone with appropriate resin and installation experience.
The 5-Mistake Checklist
Before finalising your epoxy resin calculation, check these five points:
| Mistake | What to Do Instead |
|---|---|
| ❌ Incorrect measurements | Measure twice and verify |
| ❌ Ignoring resin depth | Measure actual resin thickness |
| ❌ Wrong mixing ratio | Follow the resin manufacturer’s ratio |
| ❌ Calculating the whole object | Calculate the actual resin-filled area |
| ❌ Forgetting material losses | Allow for realistic project wastage |
And remember the additional rule:
Don’t confuse litres with kilograms.
Final Thoughts
An epoxy resin calculator can save time, reduce uncertainty and make project planning much easier.
But the calculator itself isn’t the difficult part.
The quality of the information you enter is what determines the usefulness of the result.
By measuring accurately, entering the correct depth, selecting the correct mixing ratio, calculating the actual resin-filled area and allowing for realistic material losses, you can avoid many of the costly mistakes associated with epoxy projects.
Whether you’re planning a small batch of resin coasters or a large bespoke river dining table, good calculation is the first step toward better project control.
And when you’re working on a high-value custom piece, that accuracy matters.
Planning a Custom Epoxy Project?
At KorEpox Arts, we combine artistic craftsmanship with practical resin expertise to create bespoke furniture, flooring and décor.
If you’re planning:
A river dining table
Epoxy coffee table
Resin serving tray
Custom coasters
Epoxy countertop
Decorative resin installation
Epoxy flooring
share your dimensions, design reference and requirements with us.
We’ll help you understand the material requirements and develop the right approach for your project.
KorEpox Arts
Where Art Meets Decor & Furniture
Custom Epoxy Resin Furniture | Epoxy Flooring | Resin Art & Décor
Frequently Asked Questions
What is the biggest mistake when using an epoxy resin calculator?
Using incorrect measurements or calculating the entire object instead of the actual resin-filled area are among the most common problems.
Should I calculate resin by litres or kilograms?
Either can be useful, but you must understand the difference. Litres measure volume, while kilograms measure weight. Use the manufacturer’s density information when converting between them.
Should I add extra resin to my calculation?
A practical allowance may be appropriate for mixing losses, spills, absorption and irregular surfaces. The amount depends on the project.
Can I use the same calculation for every epoxy project?
No. River tables, coasters, flooring and coatings have different calculation requirements. The resin system and application method also matter.
Does resin depth really make that much difference?
Yes. For the same resin-filled surface area, doubling the depth approximately doubles the required volume.
Can I use a calculator to determine the exact resin needed for a river table?
It can provide a useful estimate, but irregular river designs, live edges, voids and wood absorption make exact calculation more complicated. For high-value projects, professional assessment is recommended.